My Model Was Training at Home. I Was at the Gym. This Is How I Watched It.
I needed to monitor my 270M parameter model from the gym. After three failed tunneling attempts, I found a solution that works anywhere, anytime, for free.
Pavan Kumar
AI Consultant & Platform Engineer
I was halfway through my deadlifts when the thought hit me: Is my model still training, or did it crash?
My RTX 2070 was back home, crunching through a 270 million parameter neural machine translation model. The training would take hours. Maybe a full day. But I had a life to live. Gym sessions. Grocery runs. Coffee shop work.
The question that kept nagging me: How do I check if my loss curves are dropping without driving back home?
That question sent me down a rabbit hole of tunneling services, failed attempts, and eventual victory. This is what I learned.
The Problem: Your GPU Runs 24/7. You Do Not.
Training deep learning models is not a quick affair. My F-MALLOC (Flexible Memory Allocation) model for continual learning runs domain adaptation across five different text domains: IT, Koran, Law, Medical, and Subtitles. Each domain takes hours to converge.
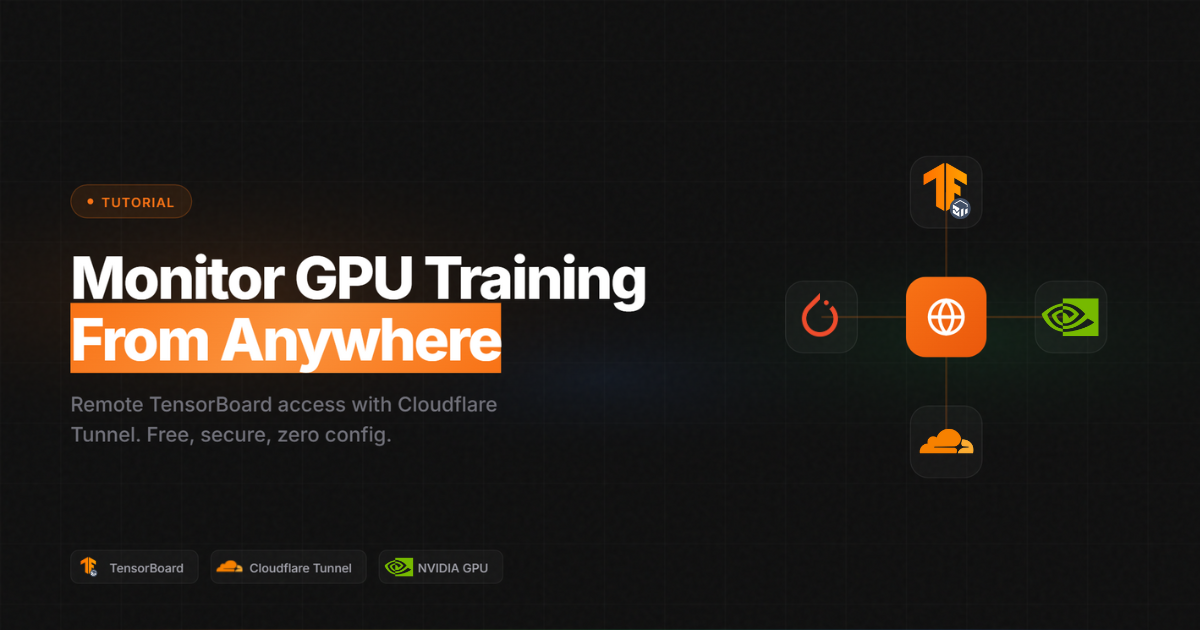
TensorBoard runs beautifully on localhost:6006. But localhost is exactly that: local. It only works on the machine running it.
What I needed:
- Access TensorBoard from my phone at the gym
- Let my friend in another state verify my results
- Share live metrics with my supervisor at university
What I had:
- A training job running on my home desktop
- TensorBoard showing metrics on localhost:6006
- No way to access any of it remotely
The traditional solutions did not fit my situation. Port forwarding requires router access and a static IP. VPN setups are complex. Cloud training is expensive for experimentation.
I needed something simpler: a way to expose my localhost to the internet, securely and temporarily.
What Is Tunneling? A Simple Explanation
Think of a tunnel like a secret passage from your computer to the outside world.
Your computer sits behind your router, invisible to the internet. A tunnel service acts as a middleman. It gives you a public URL (something like https://random-words.trycloudflare.com) and forwards all traffic from that URL to your localhost.
Your PC (localhost:6006) → Tunnel Service → Public URL → Anyone, Anywhere
The tunnel service handles the networking complexity. You just run one command.
This concept powers many developer use cases beyond ML monitoring:
- Webhook testing: Test Stripe or GitHub webhooks on your local server
- Demo sharing: Show clients a local web app without deploying
- IoT access: Reach home devices from anywhere
- Collaborative development: Share local dev servers with remote teammates
My Training Setup
Before diving into the tunnel solutions, let me share what I was monitoring.
The Model
I was training an F-MALLOC Transformer based on the WMT19 German to English translation model. The architecture uses HAT (Hard Attention to Task) layers for capacity allocation. Each domain gets dedicated FFN neurons to prevent catastrophic forgetting when learning new domains sequentially.
Specs:
| Component | Value |
|---|---|
| Total Parameters | 270 million |
| Trainable Parameters | 151 million |
| GPU | NVIDIA RTX 2070 (8GB) |
| Framework | Fairseq (modified) |
Metrics I Track in TensorBoard
| Metric | What It Tells Me |
|---|---|
| loss | Overall training progress |
| nll_loss | Negative log likelihood (actual prediction quality) |
| ppl | Perplexity (lower is better, indicates model confidence) |
| capacity_usage | Percentage of FFN neurons being used per domain |
| temperature | HAT annealing parameter for soft to hard attention |
| lr | Learning rate schedule |
| gnorm | Gradient norm (stability indicator, watching for explosions) |
When gnorm spikes, I know something went wrong. When capacity_usage stays flat, the model is not learning new features. These metrics tell the story of a training run.
The Journey: Three Failures Before Success
Attempt 1: ngrok (FAILED)
ngrok is the gold standard for tunneling. Everyone recommends it. The setup is supposedly one line.
What I tried:
from pyngrok import ngrok
tunnel = ngrok.connect(6006)
What I got:
ERR_NGROK_4018: authentication failed
Usage of ngrok requires a verified account and authtoken.
Sign up at: https://dashboard.ngrok.com/signup
ngrok changed their policy. Anonymous tunnels no longer exist. You need to create an account, verify your email, and configure an authtoken before running even a single tunnel.
For a quick monitoring session, this felt like too much friction. I did not want to create yet another account for a temporary need.
Speed test data (from LocalCan 2025 benchmarks): ngrok showed download times of 95.2 seconds at 1.10 MB/sec. Not the fastest option.
Pricing: Free tier is limited. Paid plans start at $8/month for Personal, $20/month for Pro.
Attempt 2: localtunnel (PARTIAL SUCCESS)
localtunnel is free, open source, and requires no signup. Perfect.
What I tried:
npx localtunnel --port 6006
What I got:
your url is: https://thin-eagles-flash.loca.lt
It worked on my local network. But when my friend in another state tried to access it, he got a 503 error and a strange page asking for my IP address.
localtunnel has a security feature that requires visitors to enter the server's public IP as a verification step. This defeats the purpose when you want multiple people from different locations to access your dashboard.
Additional concerns: localtunnel has not been updated since 2022 according to Pinggy's analysis. The project appears unmaintained, and there is no guarantee the default server will stay operational.
Attempt 3: serveo.net (FAILED)
serveo uses SSH for tunneling. No client to install. Just one SSH command.
What I tried:
ssh -R 80:localhost:6006 serveo.net
What I got:
ssh: connect to host serveo.net port 22: Connection refused
serveo.net appears to be down or unreliable. The service was elegant in concept but fails in practice.
Attempt 4: Cloudflare Tunnel (SUCCESS)
Cloudflare offers quick tunnels through their trycloudflare.com service. No account required for temporary tunnels.
Setup (one time):
# Download cloudflared
Invoke-WebRequest -Uri 'https://github.com/cloudflare/cloudflared/releases/latest/download/cloudflared-windows-amd64.exe' -OutFile 'cloudflared.exe'
Create tunnel:
.\cloudflared.exe tunnel --url http://localhost:6006
Output:
+--------------------------------------------------------------------------------------------+
|  Your quick Tunnel has been created! Visit it at:                                          |
|  https://rogers-recovery-million-items.trycloudflare.com                                   |
+--------------------------------------------------------------------------------------------+
That URL worked. From my phone at the gym. From my friend's laptop in another state. From my supervisor's office computer. Everyone could see my TensorBoard dashboard in real time.
Why Cloudflare works:
- No account for quick tunnels: Just download and run
- No IP verification: Anyone with the URL can access
- Fast: Speed tests show 18.1 seconds download time at 5.79 MB/sec (46.30 Mbps). That is 5x faster than ngrok.
- Free: Quick tunnels cost nothing
- Secure: HTTPS by default, random URLs, temporary sessions
The Complete Solution: Architecture
flowchart TB
    subgraph HOME["HOME DESKTOP PC"]
        GPU["GPU Training<br/>(RTX 2070)"]
        TB["TensorBoard<br/>:6006"]
        CF["cloudflared<br/>tunnel"]
        GPU --> TB --> CF
    end

    CF --> EDGE["Cloudflare Edge<br/>(Global CDN)"]

    EDGE --> GYM["Me @ Gym<br/>(Phone)"]
    EDGE --> FRIEND["Friend in<br/>Another State"]
    EDGE --> SUPER["Supervisor<br/>(Office)"]

    style HOME fill:#1e293b,stroke:#f97316,stroke-width:2px
    style GPU fill:#334155,stroke:#f97316
    style TB fill:#334155,stroke:#f97316
    style CF fill:#334155,stroke:#f97316
    style EDGE fill:#f97316,stroke:#ea580c,color:#fff
    style GYM fill:#1e293b,stroke:#22c55e
    style FRIEND fill:#1e293b,stroke:#22c55e
    style SUPER fill:#1e293b,stroke:#22c55e
Step by Step: Set This Up in 5 Minutes
Step 1: Start TensorBoard (if not already running)
tensorboard --logdir checkpoints/your-experiment/tensorboard --port 6006 --bind_all
The --bind_all flag allows connections from any interface, not just localhost. This is required for the tunnel to work.
Step 2: Download cloudflared (one time)
Windows:
Invoke-WebRequest -Uri 'https://github.com/cloudflare/cloudflared/releases/latest/download/cloudflared-windows-amd64.exe' -OutFile 'cloudflared.exe'
Linux/Mac:
# Mac
brew install cloudflare/cloudflare/cloudflared

# Linux (Debian/Ubuntu)
wget https://github.com/cloudflare/cloudflared/releases/latest/download/cloudflared-linux-amd64.deb
sudo dpkg -i cloudflared-linux-amd64.deb
Step 3: Create the tunnel
.\cloudflared.exe tunnel --url http://localhost:6006
Copy the URL from the output. That is your remote access point.
Step 4: Access from anywhere
Open that URL on any device. You will see your TensorBoard dashboard with all your training metrics updating in real time.
What I Monitored From the Gym
During Update 510, I checked my phone between sets. The dashboard showed:
| Metric | Value | Assessment |
|---|---|---|
| Loss | 4.308 | Decreasing steadily |
| Perplexity | 6.28 | Reasonable for this domain |
| Capacity Usage | 30.6% | Good, not saturated |
| Temperature | 1.181 | Annealing as expected |
| Learning Rate | 6.375e-05 | Following warmup schedule |
| GPU Memory Free | 2.8 GB | No memory issues |
No NaN explosions. No crashed processes. The training was stable. I finished my workout in peace.
Earlier in this project, I had dealt with exploding gradients causing NaN losses. Watching gnorm spike to infinity from the gym would have been stressful. But those bugs were fixed (MAX_TEMP=2.0 and aggressive gradient clipping saved the day), and now I could verify stability from anywhere.
Comparison: Tunneling Services in 2025
Based on my testing and industry benchmarks:
| Service | Signup | IP Check | Speed | Reliability | Cost |
|---|---|---|---|---|---|
| ngrok | Required | No | 1.1 MB/s | High | $0-39/mo |
| localtunnel | No | Yes | Unknown | Medium | Free |
| serveo | No | No | N/A | Low (down) | Free |
| Cloudflare | No* | No | 5.8 MB/s | High | Free |
*Quick tunnels need no signup. Named persistent tunnels require a Cloudflare account.
Verdict: Cloudflare wins on speed, reliability, and friction. For temporary development and monitoring needs, quick tunnels are the best option in 2025.
Security Considerations
Exposing localhost comes with risks. Understand them before proceeding.
What you are exposing:
- Anyone with the URL can view your TensorBoard
- URLs are random but could be shared or intercepted
- TensorBoard has no built in authentication
Mitigations:
- Temporary URLs: Quick tunnel URLs expire when you close cloudflared
- Do not share publicly: Keep the URL private, share only with trusted people
- Read only service: TensorBoard is view only, no one can modify your training
- Production alternative: Use Cloudflare Access for authenticated tunnels if you need persistent, protected access
For monitoring my own training runs, the security tradeoff is acceptable. I share the URL with my supervisor, check metrics for a few hours, then close the tunnel. The URL becomes invalid immediately.
Beyond TensorBoard: Other Use Cases
This tunneling approach works for any localhost service:
| Use Case | Command |
|---|---|
| TensorBoard | cloudflared tunnel --url http://localhost:6006 |
| Jupyter Notebook | cloudflared tunnel --url http://localhost:8888 |
| MLflow | cloudflared tunnel --url http://localhost:5000 |
| FastAPI dev server | cloudflared tunnel --url http://localhost:8000 |
| React dev server | cloudflared tunnel --url http://localhost:3000 |
The pattern is always the same: run your service locally, tunnel it, share the URL.
Alternatives Worth Knowing
If Cloudflare does not fit your needs, consider these alternatives documented in awesome-tunneling:
For persistent production tunnels: Use Cloudflare Tunnel with a free account for named tunnels and custom domains.
For team collaboration: Tailscale creates a private network between your devices. Better for ongoing team access.
For integrated ML monitoring: Weights and Biases, Neptune.ai, or MLflow provide cloud hosted dashboards that sync automatically. No tunneling required, but you give up some data control.
For self hosted tunneling: frp and bore let you run your own tunnel server if you have a VPS.
What I Learned
Three weeks of training runs later, remote monitoring has changed how I work.
Before:
- Start training
- Check laptop every 30 minutes anxiously
- Cancel gym plans when training a big model
- Feel tethered to my desk
After:
- Start training
- Open tunnel
- Live my life
- Glance at phone occasionally
- Fix issues only when they actually happen
The mental freedom is worth more than the technical convenience.
The Numbers
| Metric | Before | After |
|---|---|---|
| Time to set up remote access | 30+ minutes (VPN, port forwarding) | 2 minutes |
| Cost | $0-20/month (ngrok, VPN services) | Free |
| Number of failed training runs I missed | 3 in one month | 0 |
| Peace of mind at the gym | Nonexistent | Complete |
Should You Use This?
Yes, if you:
- Train models on local GPUs and want remote visibility
- Need to share live dashboards with collaborators
- Want a free, zero configuration solution
- Value simplicity over enterprise features
Skip it if you:
- Train exclusively on cloud platforms (AWS, GCP already have remote dashboards)
- Need persistent, authenticated access (use Cloudflare Tunnel with an account)
- Work in an environment where exposing localhost is prohibited
Your Next Steps
Right now (5 minutes):
- Download cloudflared for your OS
- Run
cloudflared tunnel --url http://localhost:6006while TensorBoard is running - Open the URL on your phone to verify it works
This week:
- Set up a monitoring routine for your next training run
- Share the URL with a collaborator and get their feedback
- Experiment with tunneling other services (Jupyter, MLflow)
Within a month:
You will wonder how you ever managed long training runs without remote access.
Get the Tools
Cloudflared releases: https://github.com/cloudflare/cloudflared/releases
Quick tunnel documentation: https://developers.cloudflare.com/cloudflare-one/connections/connect-networks/do-more-with-tunnels/trycloudflare/
TensorBoard documentation: https://www.tensorflow.org/tensorboard
One Last Thing
If you set this up for your own training runs, I want to hear about it.
What are you training? What metrics do you watch? Did you find any issues I did not cover?
Reach out on LinkedIn or open a discussion on GitHub. The best technical content comes from real world usage stories. This is mine. Now show me yours.
Found this useful? Share it with a fellow ML engineer who is still running to their desk every time they wonder if their training crashed.
Sources
Tagged with